
Warren homeowners can experience low water pressure because of a clogged fixture, partially closed shutoff valve, failing pressure-reducing valve, corroded piping, hidden leak, municipal supply problem, or private-well issue. If only one fixture is affected, inspect that fixture first. If pressure is low throughout the house, a plumber should test static and flowing pressure and inspect the main water-control components.
Low water pressure in a Warren home can result from a clogged fixture, a partially closed shutoff valve, a failing pressure-reducing valve, or corroded pipes. Low water pressure in Warren NJ homes can result from a clogged fixture, a partially closed shutoff valve, a failing pressure-reducing valve, or corroded pipes.
It can also come from a plumbing leak, municipal supply conditions, or a problem with a private well system. The fastest way to narrow down the cause is to determine whether the pressure loss affects one fixture, one floor, or the entire house. Local diagnosis in Warren also depends on the home’s water source, age, elevation, service-line condition, and internal plumbing layout, since no two properties in town share the exact same setup.
Queen B Plumbing, Heating & Cooling is a Warren-based, woman-owned company with more than 40 years of combined experience. Homeowners across the area count on Queen B whenever they notice low water pressure in Warren NJ, whether the cause turns out to be a simple fixture or something further upstream.
The team focuses on identifying the actual restriction before recommending a repair, rather than guessing at the cause. That approach helps homeowners avoid paying for work that does not solve the real problem. Readers in town can see the full range of Warren plumbing services Queen B provides, including diagnostic-first leak detection and drain work.
First, Determine How Widespread the Problem Is
The single most useful step in diagnosing low water pressure is figuring out how many fixtures are affected. A problem at one faucet points to a local, easy-to-check cause like a clogged aerator or a worn cartridge. A problem across the entire home points to something upstream, such as the main shutoff valve, the pressure-reducing valve, or the water service line itself. The table below matches common symptom patterns to their most likely cause, which helps a homeowner describe the issue clearly when calling a plumber.
| Symptom | Most likely direction |
| One faucet has weak flow | Clogged aerator, fixture valve, or faucet cartridge |
| One shower is weak | Clogged showerhead, cartridge, or branch piping |
| All fixtures are weak | PRV, main shutoff, leak, service line, or supply issue |
| Only upstairs fixtures are weak | Elevation, undersized piping, restriction, or booster requirement |
| Pressure drops when another fixture runs | Flow restriction, undersized piping, or weak well system |
| Pressure changes sharply or cycles | Well pump, pressure tank, pressure switch, or leak |
| Pressure fell suddenly after work | Shutoff valve position, debris, or disturbed plumbing |
It also helps to understand the difference between pressure and flow, since homeowners often use the terms interchangeably. A fixture can have adequate static pressure but still deliver poor flow if a valve, pipe, screen, or cartridge is restricted somewhere along the line. Working through this distinction first is the fastest way to resolve low water pressure in Warren, NJ without paying for the wrong repair.
Common Causes of Low Water Pressure in Warren NJ
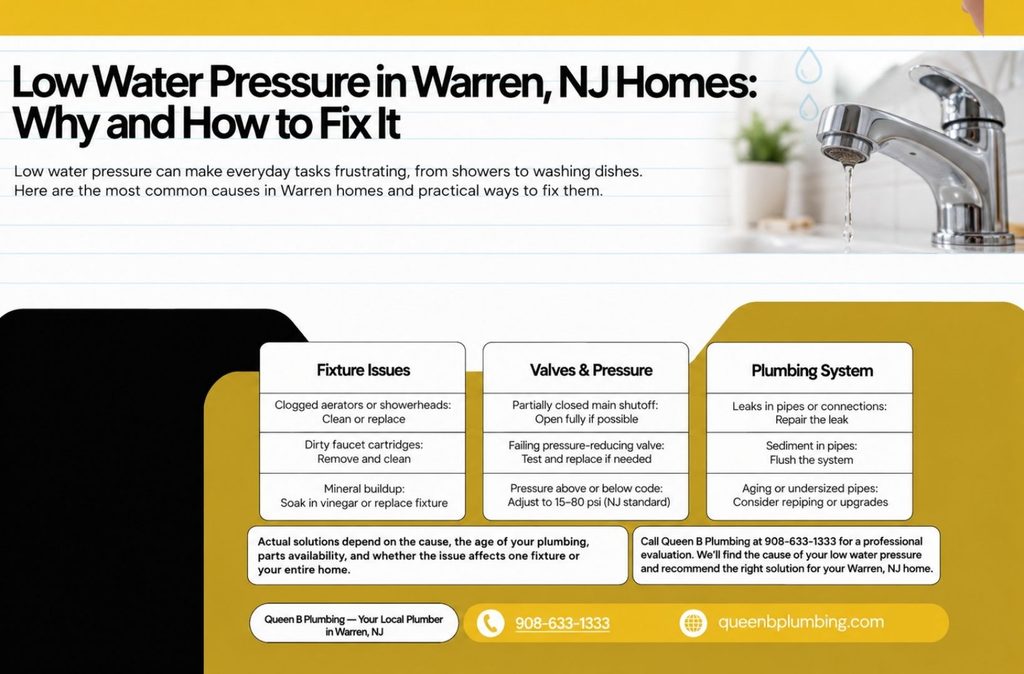
Once a homeowner knows whether the problem is isolated or whole-house, the next step is matching that pattern to a likely cause. Several distinct issues can produce low water pressure, and each one behaves a little differently depending on where it sits in the plumbing system. Some causes are simple and safe for a homeowner to check, while others involve components that should only be handled by a licensed plumber. The sections below walk through the most common causes seen in Warren homes, starting with the ones closest to the fixture and moving toward the water source itself.
A Partially Closed Main Shutoff Valve
The home’s main shutoff valve is typically located near the water meter or at the point where the service line enters the building. It can end up partially closed after plumbing work, a renovation, an emergency shutoff, or routine maintenance. Even a small reduction in how far the valve is open can noticeably reduce pressure throughout the house. Checking this valve first is one of the fastest ways to rule out a simple, no-cost explanation.
Recommended homeowner guidance:
- Confirm the valve is fully open if it is designed for that operation.
- Do not force a seized or fragile valve.
- If the valve is damaged, leaking, or difficult to operate, call a plumber.
A Failing Pressure-Reducing Valve
Many homes connected to municipal water rely on a pressure-reducing valve, or PRV, to bring incoming street pressure down to a safe level for household plumbing. When a PRV starts to wear out, homeowners often notice gradually declining pressure, inconsistent flow, or pressure that drops significantly whenever a fixture is running. Because the PRV sits at the point where street pressure meets household plumbing, a failure there tends to affect the whole house rather than a single fixture. Understanding how this valve works also makes it easier to interpret a pressure reading correctly.
It helps to separate two types of readings when talking about pressure:
- Static pressure: Reading when no fixture is running.
- Flowing pressure: Reading while water is running.
- A pressure gauge reading alone does not identify every restriction.
New Jersey plumbing guidance generally treats 15 psi as a minimum fixture pressure and 80 psi as the upper limit for distribution pressure, with pressure above 80 psi typically requiring pressure reduction. These figures come from New Jersey water pressure standards that establish minimum and maximum pressure requirements for plumbing systems. These are useful reference points rather than a guarantee that every home should read exactly the same number.
A Failing Pressure-Reducing Valve
Many homes connected to municipal water rely on a pressure-reducing valve, or PRV, to bring incoming street pressure down to a safe level for household plumbing. When a PRV starts to wear out, homeowners often notice gradually declining pressure, inconsistent flow, or pressure that drops significantly whenever a fixture is running. Because the PRV sits at the point where street pressure meets household plumbing, a failure there tends to affect the whole house rather than a single fixture. Understanding how this valve works also makes it easier to interpret a pressure reading correctly.
It helps to separate two types of readings when talking about pressure:
- Static pressure: Reading when no fixture is running.
- Flowing pressure: Reading while water is running.
- A pressure gauge reading alone does not identify every restriction.
Under the International Plumbing Code as adopted by New Jersey, the minimum static pressure at every fixture supply outlet is 15 psi, and the maximum static pressure at any point in the distribution system must not exceed 80 psi, with pressure above 80 psi requiring a pressure-reducing valve before water enters the building’s internal distribution system. These are useful reference points rather than a guarantee that every home should read exactly the same number, and a plumber should still confirm both static and flowing pressure on site. Homeowners who want to review the underlying code language directly can consult the New Jersey water pressure standards that establish these minimum and maximum figures.
Clogged Aerators, Showerheads, or Cartridges
Mineral deposits, sediment, and debris are among the most common reasons a single fixture loses pressure while the rest of the house works fine. These deposits build up gradually inside the small openings of an aerator or showerhead, narrowing the path water has to travel. Because this type of restriction is local to the fixture, it will not show up as a whole-house problem on a pressure gauge reading at the main. If nearby fixtures are working normally, it makes sense to start with the affected fixture rather than assuming a bigger issue is at play.
Safe troubleshooting:
- Remove and clean the faucet aerator.
- Inspect the showerhead for buildup.
- Check whether the fixture’s shutoff valves are open.
- Compare hot and cold flow.
- If only hot water is weak, suspect a water-heater valve, cartridge, or hot-water-side restriction.
Homeowners should stop short of taking apart anything beyond the fixture itself. If weak hot water shows up at more than one fixture rather than just one, it may be worth having checked through Queen B’s water heater services instead of assuming it’s the fixture. Disassembling a gas appliance or altering a pressure control is a job for a licensed plumber, not a DIY fix.
Corroded or Restricted Supply Pipes
Older homes in Warren may still have galvanized steel pipes, and these pipes can narrow internally over time as corrosion and scale build up along the interior walls. Unlike a clogged aerator, this kind of restriction sits inside the pipe itself and cannot be cleared by cleaning a single fixture. The narrowing tends to worsen gradually, which is why homeowners sometimes describe the pressure loss as something that crept up over several years rather than happening all at once. Because the restriction is inside the plumbing, it often shows up at more than one fixture, particularly in older sections of the system.
Common symptoms include:
- Gradual pressure decline over the years.
- Rust-colored water after the fixture sits unused.
- Poor flow at multiple fixtures.
- More severe restriction in older sections of the system.
Cleaning an aerator will not solve a restriction that lives inside the pipe’s bore. Depending on the assessment, the appropriate remedy may involve replacing a section of piping or repiping the home entirely.
A Hidden Plumbing Leak
A leak diverts water away from the fixtures a homeowner is actually trying to use, and that diversion can show up as reduced pressure, especially when another fixture is running at the same time. Unlike a clogged fixture or a worn valve, a leak often comes with other warning signs that point beyond the plumbing itself. Catching these signs early can prevent a small leak from turning into a larger repair involving structural or water damage. The list below covers the most common indicators worth watching for.
Warning signs include:
- Water meter movement when all fixtures are off.
- Damp areas, staining, or musty odors.
- Unexplained increases in water usage.
- Hissing or running-water sounds.
- A pump that cycles when no water is being used.
If there is an active leak and a risk of damage, the safest step is to shut off the home’s water and contact a professional right away. Opening walls or excavating a service line should never be treated as a DIY step.
Municipal Supply or Street-Side Issues
A pressure problem does not always start inside the home. Maintenance work, a water-main issue, hydrant activity, or a period of unusually high demand on the municipal system can all cause a temporary drop that has nothing to do with the home’s own plumbing. A utility’s responsibility for pressure is generally measured at the curb or property connection, while everything downstream of that point falls under the homeowner’s plumbing. This standard comes from New Jersey utility pressure regulations, which require water utilities to maintain adequate pressure and volume at that service point.
New Jersey utility rules require adequate pressure and volume to be delivered at the applicable service point, which is why ruling out a street-side cause is worth doing before assuming the problem originates inside the house.
Recommended process:
- Ask neighbors whether they have the same issue.
- Check the local water provider for outage or maintenance notices.
- Compare pressure at different times of day.
- Have a plumber test pressure at the building and, where appropriate, assess the service line.
Private Well Problems
Not every Warren property is connected to municipal water, so well owners need a dedicated explanation of what can go wrong on their end. A private well system relies on several components working together, including the pump, the pressure tank, and the pressure switch that tells the pump when to turn on and off. When one of these components fails or drifts out of adjustment, the effect on household pressure can look similar to a municipal-side problem even though the cause is entirely different. Because well systems involve powered equipment, the safety boundaries around DIY troubleshooting are stricter here than with municipal-supply issues. Queen B’s well pump and pressure tank repair covers exactly these components, so a technician can diagnose the system without the homeowner touching anything energized.
Potential causes include:
- Low pressure-switch settings.
- A failing well pump.
- A waterlogged or damaged pressure tank.
- A clogged sediment filter.
- A blocked intake or treatment component.
- A leak in the well-water distribution system.
Homeowners should not adjust pressure-switch settings or work on energized well-pump equipment without qualified assistance. Well systems combine electrical components with pressurized water, and an incorrect adjustment can create an unsafe situation rather than fix the original problem.
Why Upstairs Fixtures May Have Weaker Pressure
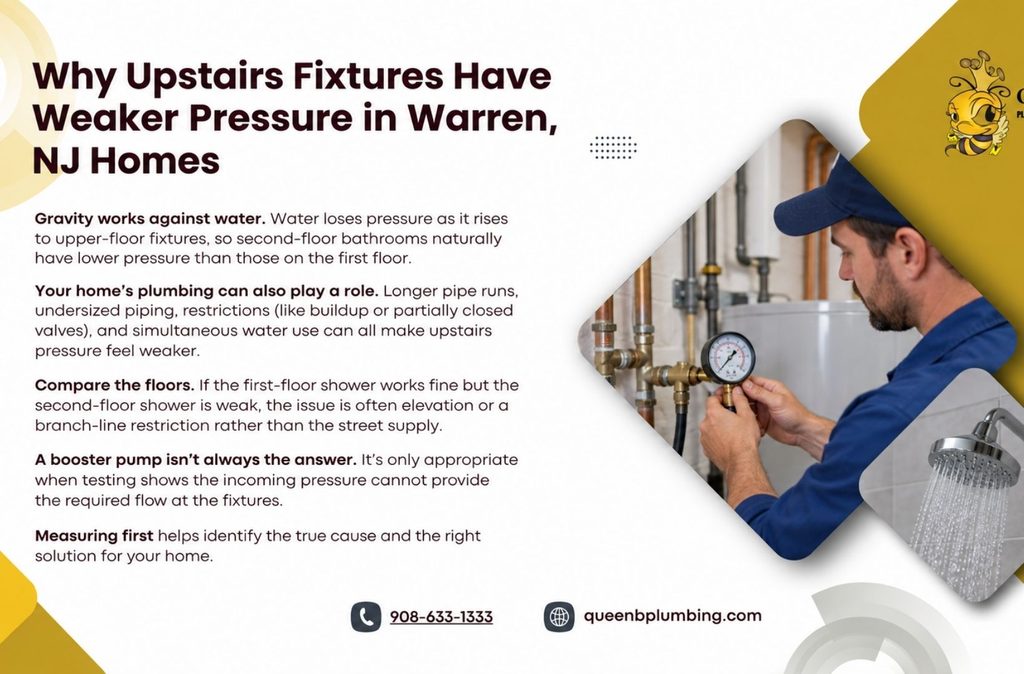
Water naturally loses pressure as it climbs from the point of entry to a fixture on an upper floor. This happens because gravity works against the water the entire way up, and the effect gets stronger the higher a fixture sits above the service entrance. Long pipe runs, undersized piping, restrictions along the way, and simultaneous demand from other fixtures can all add to that natural pressure loss. The result is that a second-floor shower can feel noticeably weaker than a first-floor shower even when nothing in the system is technically broken.
A simple example helps illustrate the point. If the first-floor shower works reasonably well but the second-floor shower is weak, the issue may be elevation or a restriction on the branch serving that floor rather than a problem with the street supply itself.
The New Jersey Plumbing Code’s water distribution requirements call for a booster pump only when street pressure can’t deliver the flow required at fixtures, which is why measuring first matters. New Jersey code addresses booster systems for situations where available supply pressure is insufficient to provide the flow required at fixtures, particularly on upper floors of taller buildings.
Safe Homeowner Checks
Before calling a plumber, there are several checks a homeowner can safely run through at home. Working through them in order helps narrow down the cause and gives the plumber useful information up front. None of these steps require special tools beyond a hose-bib pressure gauge, and none involve touching anything electrical or pressurized beyond a standard fixture. The list below follows the same logic used throughout this article, starting broad and then narrowing down.
- Identify whether the problem affects one fixture, one floor, or the whole home.
- Clean the affected faucet aerator or showerhead.
- Confirm accessible fixture shutoff valves are open.
- Check whether the main shutoff was disturbed recently.
- Look for visible leaks and listen for unexplained running water.
- Ask neighbors or the water provider about possible supply issues.
- Attach a hose-bib pressure gauge if the homeowner can do so safely without forcing a connection.
- Record pressure with no water running and while a fixture is operating.
A word of caution: Do not force shutoff valves, bypass a pressure regulator, adjust well controls, or work on electrical components. A damaged valve or incorrect pressure adjustment can cause leaks, equipment damage, or unsafe operating conditions.
How a Plumber Diagnoses Low Water Pressure in Warren NJ
A professional visit follows a more systematic process than a homeowner can run at home, since a plumber has access to tools and training that go beyond a basic pressure gauge. The process starts broad and narrows down toward the specific component causing the problem, much like the symptom-pattern approach described earlier in this article. Every visit is a little different depending on the home’s water source, age, and layout, so the steps below describe a general process rather than an identical checklist for every property. The goal throughout is to identify the actual restriction rather than guessing at a fix.
A typical diagnostic process includes:
- Review the symptom pattern and timing.
- Identify whether the property uses municipal water or a private well.
- Measure static and flowing pressure.
- Inspect the main shutoff and PRV.
- Check filters, treatment equipment, and accessible piping.
- Test for signs of leaks or abnormal meter movement.
- Assess fixture-level restrictions.
- Evaluate elevation and distribution piping.
- Recommend the least-invasive effective repair before larger work.
Queen B Plumbing, Heating & Cooling approaches every low-pressure call this way, working through the system methodically instead of jumping straight to the most expensive repair.
Warren homeowners who want that kind of methodical diagnosis can schedule a plumbing inspection directly with the Queen B team. That approach tends to save homeowners money, since a problem that turns out to be a $20 aerator does not need to be treated like a repiping job.
When to Call a Plumber for Low Water Pressure in Warren, NJ
Some low-pressure situations are minor enough to wait, while others call for prompt professional attention. Knowing the difference helps a homeowner decide whether to schedule a routine visit or treat the issue as more urgent. The list below covers the situations where calling a plumber sooner rather than later makes sense. A few of these, like a suspected leak or a leaking PRV, carry a higher risk of water damage if left unaddressed.


